[2025 Update] Japan Passport Photo Rules: Online vs. In-Person Applications, Plus How to Make Your Signature Image
A passport is essential for travelling abroad.
You can now apply online as well, so there are more ways to apply than before.
The photo rules differ a little between the online and in-person (counter) applications. This article explains those differences clearly.
For a detailed overview of the online application, see this page.
[2025 Update] Complete Guide to Applying for a Japanese Passport Online: Steps, Required Documents and Photo Tips
Contents
- Photo requirements for in-person passport applications
- Photo requirements for online passport applications
- Tips for creating your signature image
- What are the key differences between the two methods?
- Photo studio vs. photo booth: where should you get your photo taken?
- Need a passport photo in Shinjuku? Try 19Studio!
- Summary: which application method should you choose?
Photo requirements for in-person passport applications
Key points for the photo
When you apply in person at the counter, you submit a printed photo taken at a photo studio or similar.
Please use the points and format below as a guide.
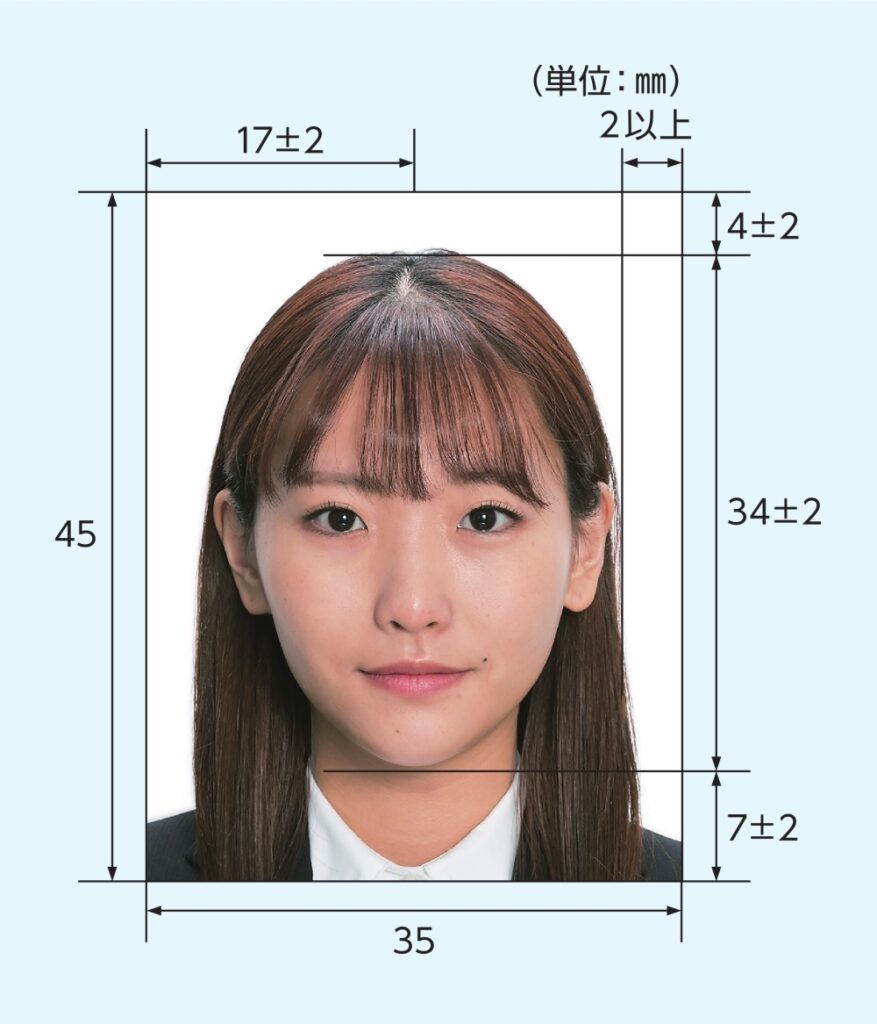
Key points
- Photo size: 45 mm tall × 35 mm wide, with no border
- Background: plain, with no pattern (a plain, light color)
- Date taken: within 6 months before the application date
- Aspect ratio: 45:35 (45 mm tall × 35 mm wide)
- Face position: your face must fit within a set area (there are rules for eye height and face size)
- Glare: watch out for reflections on glasses and for shadows
You must write the applicant's name on the back of the photo (press lightly so the writing doesn't show through on the front).
Also take care that the ink doesn't bleed through to the front and that you don't leave any dents or bumps in the print.
Photo requirements for online passport applications
Since March 24, 2025 (Reiwa 7), you can apply for a passport online anywhere in Japan.
Here are some points to watch if you plan to submit your photo online.
Key points for the photo
While applying in the My Number Card app (the app for Japan's national ID card, the My Number Card), you can take a photo with your smartphone. You can also upload photo data taken in advance at a photo studio or similar.
Please use the points and format below as a guide.
Key points
- File format: JPG (for applications within Japan)
- File size: 600 KB or less (for applications within Japan)
- Resolution: the higher the quality, the better
- Background: white or a light color (make sure no shadows show)
- Aspect ratio: 73:60 (730 px tall × 600 px wide)
- Face position: your face must fit within a set area (there are rules for eye height and face size)
- Glare: no reflections on glasses and no shadows
(Note that the aspect ratio differs from the 45 mm tall × 35 mm wide size used for paper applications!)
Things to keep in mind when taking the photo with a smartphone
- Face the camera straight on, without a hat
- When using a phone or camera, watch the brightness and avoid shadows
- You may need to resize or crop the image
- No editing is allowed, such as changing the size of your eyes or facial features, retouching your skin, or changing your eye color!
Minimal touch-ups, such as hiding skin irritation, dark circles or facial hair, are fine. However, any editing that makes you hard to recognize is strictly prohibited.
Even if the photo passes face recognition, you may not be able to verify your identity when your ID is checked abroad, so be careful.
If you upload photo data taken in advance at a photo studio or similar, please use the format below as a guide.
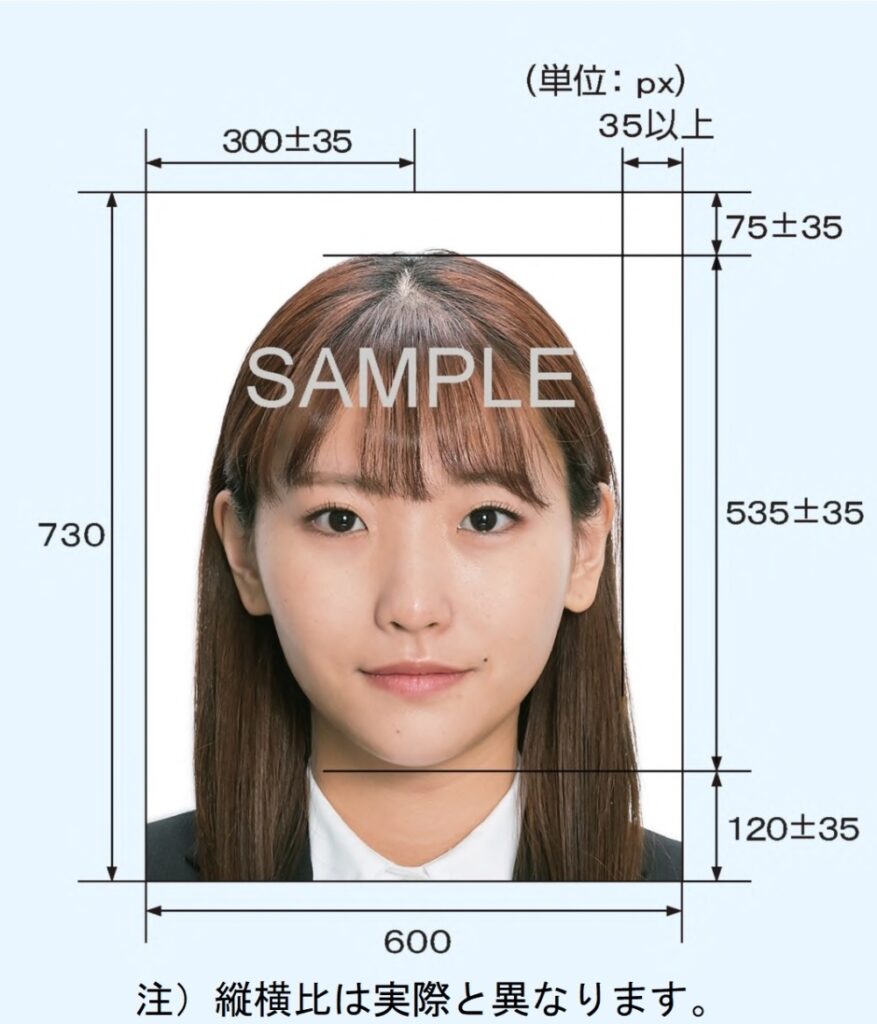
The file requirements also differ depending on whether you apply from inside or outside Japan, so be sure to check this too.
Applying online from within Japan
- File format: JPG
- File size: 600 KB or less
Applying online from outside Japan
- File format: JPG, JPEG, BMP or PNG
- File size: 20 KB to 2 MB (even if your file size is within this range, the file is compressed when uploaded, and you will get an error if the compressed size exceeds the limit.)
Tips for creating your signature image
To confirm that the passport belongs to you, you must also submit a signature image.
With an in-person application, you sign the form directly. With an online application, you need to photograph your signature on paper and upload it as data.
Let's go over the main points and cautions.
Key points
- Paper: sign on white paper with black ink or a black ballpoint pen
- Line thickness: write so the signature is clearly visible
- Background: no wrinkles in the paper
- Scanning or photographing: take the picture with even lighting so no shadows fall on the paper
- File format: JPEG (for applications within Japan)
- File size: 200 KB or less (for applications within Japan)
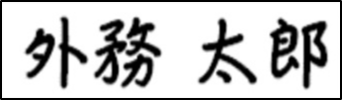
Notes on the face photo and signature image for online applicationshttps://www.mofa.go.jp/mofaj/toko/passport/page24_002222.html
Checklist for making and photographing your signature image
- Signed by the applicant themselves
- Signed in dark black or blue ink
- Write as large and as bold as you can
- The signature is not cut off
- The background is plain white
- The background has no dirt or stains
- Make sure no shadows fall on the paper
- Shoot from directly above in a bright place, matching the size of the on-screen guide
If someone else signs on your behalf, the legal representative's name and their relationship to the applicant must be written below the applicant's name. Please be careful!
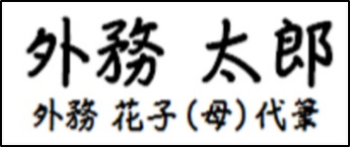
Notes on the face photo and signature image for online applicationshttps://www.mofa.go.jp/mofaj/toko/passport/page24_002222.html
You can photograph your signature during the application, but you can also upload a signature image you prepared beforehand. Please use the details below as a guide.
As with the face photo, the file requirements differ depending on whether you apply from inside or outside Japan, so be sure to check.
Applying online from within Japan
- File format: JPG
- Size: 788 px wide × 284 px tall
- File size: 200 KB or less
Applying online from outside Japan
- File format: JPG, JPEG, BMP or PNG
- Color mode: RGB color
- File size: 20 KB to 2 MB (even if your file size is within this range, the file is compressed when uploaded, and you will get an error if the compressed size exceeds the limit.)
What are the key differences between the two methods?
Here is a rough summary of how the in-person and online applications differ.
| Face photo | Signature | Procedure | Things to watch | |
| In person | Submit a printed ID photo from a photo studio or similar (45 mm tall × 35 mm wide) | Sign directly on the application form | You must go to the passport counter to apply and to collect your passport | Watch the print quality and the paper type (glossy or matte) |
| Online | Upload a JPG taken with a smartphone or similar (730 px tall × 600 px wide) | Upload a JPG of your signature written on paper | Completed online, with no need to go to a counter (with some exceptions) | Images must meet the size and quality requirements |
(Note) As the table shows, the aspect ratio of the photo differs between in-person and online applications. Please be careful.
Photo studio vs. photo booth: where should you get your photo taken?
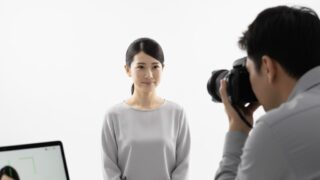
You can also get an ID photo from a photo booth (an automatic ID photo machine), but for a passport we recommend a photo studio!
Benefits of a photo studio
1. High-quality, clean results
Your face is sharp and the photo is taken at the correct size.
2. Fully meets the requirements
The photographer knows the passport standards well, so you can feel at ease.
3. Retakes are fine
With a booth, you may only get two or three retakes, or none at all!
4. You can get the photo as data
This is handy for online applications.
A passport is used for 10 years (or 5 years).
If you want a photo you will be happy with, we recommend having it taken at a photo studio!
Need a passport photo in Shinjuku? Try 19Studio!
Photo booths vary a lot by model. Older ones may have weak lighting that makes your face look dark, or may not let you receive the photo as data. If you want consistently high-quality ID photos, we recommend having them taken at a studio.
19Studio also accepts same-day reservations, so it's a good choice if you need an ID photo in a hurry.
Summary: which application method should you choose?
Applying online is quick and convenient, but you need to check the size and rules for your photo and signature image carefully.
With an in-person application, having your photo taken at a photo studio is the safe choice. Pick the method that suits you!
If your passport photo or signature image doesn't meet the requirements, your application may not be accepted, so please be careful!
If you're about to apply for a passport, we hope this summary helps.
- I'm involved in 19Studio as a new business of an IT company, and my day job is advertising and marketing. I'm good at thinking about how to get the right information to the people who need it, and I work on making our prices, services and booking as clear and easy as possible.
Latest posts
 Exam & School ID PhotosSeptember 16, 2026【2026 Edition】A Must-See for Students Taking the AO Admissions Exam! Tips for ID Photos That Bring You Closer to Passing
 Job-Hunting ID PhotosSeptember 14, 2026【Latest 2026 Edition】Is This Photo Okay? Retake Standards for Job-Hunting ID Photos & Checklist to Avoid Rejection
 Hair, Makeup & OutfitsSeptember 11, 2026Is Self-Applied Makeup OK for Job Hunting? Points for Making a Good Impression and Tips for Success